A mom's journal of the sweet things in her life...
Showing posts with label Daring Bakers. Show all posts

Wednesday, October 27, 2010

Daring Bakers: Doughnuts


The October 2010 Daring Bakers challenge was hosted by Lori of Butter Me Up. Lori chose to challenge Daring Bakers to make doughnuts. She used several sources for her recipes including Alton Brown, Nancy Silverton, Kate Neumann and Epicurious.


When I read that October's challenge was doughnuts, I was intrigued. I've never been a huge fan of doughnuts mind you, but I've had the odd one that was well worth the caloric intake. Those were the ones that were so fresh, they were still warm when I bit into them. And I figured homemade doughnuts could only be better...so why not?

I made my doughnuts on a day when my sister's family was coming over for the afternoon. Thank God I did. The kids devoured them, which made it all worth the effort. The adults enjoyed them too - but in a more mature, restrained way.

The dough was super easy to make and came together easily although it was quite soft and therefore, easy to make mis-shaped doughnuts. I just used cookie cutters to form mine. 
The recipe said to let them cool before glazing them, however, I found that it was much easier to just dip them in the glaze while they were still hot.
You could really get creative with the glazes if you were so inclined, but I kept mine simple and kid-friendly.
I made a chocolate glaze and a simple sugar glaze, the latter being my favorite. Our guests arrived just as they were going into the fryer and so, needless to say, I didn't have any time to get creative with my camera before they were eaten.
The best part was the doughnut holes. You could pop one in your mouth without any real thought, and therefore guilt, and skip the sticky fingers. I rolled some of the "holes" in a sugar cinnamon mixture which was also good.
My 10 year old nephew declared that my doughnuts were as good as Tim Horton's. When he received 'the look' from both me and my sister simultaneously, he quickly retracted his statement and declared that they were 'better than Tim Horton's'. He's a good kid.


I'd read that they didn't keep well and had to be enjoyed the same day. There were 4 doughnuts leftover and, just out of curiosity, I put them in a rubbermaid to see what they'd be like the next day. Disgusting. They were slightly shriveled and soggy. I threw them out.

The moral of the story is that you don't want to make these when there's only a few people around to enjoy them. They aren't hard to make, but they do take some time. And no matter how big a lover of doughnuts you may be, no one person could possible eat enough to warrant making these for anything less than a small crowd.


To see what the other Daring Bakers came up with this month, head on over to the Daring Kitchen.


Recipe for Doughnuts
(Source: Alton Brown)
1 1/2 cups milk
2 1/2 ounces vegetable shortening, approximately 1/3 cup
2 packages instant yeast
1/3 cup warm water (95 to 105 degrees F)
2 eggs, beaten
1/4 cup sugar
1 1/2 teaspoons salt
1 teaspoon freshly ground nutmeg
23 ounces all-purpose flour, plus more for dusting surface
Peanut or vegetable oil, for frying (1 to 1/2 gallons, depending on fryer)

Directions
Place the milk in a medium saucepan and heat over medium heat just until warm enough to melt the shortening. Place the shortening in a bowl and pour warmed milk over. Set aside.

In a small bowl, sprinkle the yeast over the warm water and let dissolve for 5 minutes. After 5 minutes, pour the yeast mixture into the large bowl of a stand mixer and add the milk and shortening mixture, first making sure the milk and shortening mixture has cooled to lukewarm. Add the eggs, sugar, salt, nutmeg, and half of the flour. Using the paddle attachment, combine the ingredients on low speed until flour is incorporated and then turn the speed up to medium and beat until well combined. Add the remaining flour, combining on low speed at first, and then increase the speed to medium and beat well. Change to the dough hook attachment of the mixer and beat on medium speed until the dough pulls away from the bowl and becomes smooth, approximately 3 to 4 minutes. Transfer to a well-oiled bowl, cover, and let rise for 1 hour or until doubled in size.

On a well-floured surface, roll out dough to 3/8-inch thick. Cut out dough using a 2 1/2-inch doughnut cutter or pastry ring and using a 7/8-inch ring for the center whole. Set on floured baking sheet, cover lightly with a tea towel, and let rise for 30 minutes.

Preheat the oil in a deep fryer or Dutch oven to 365 degrees F. Gently place the doughnuts into the oil, 3 to 4 at a time. Cook for 1 minute per side. Transfer to a cooling rack placed in baking pan. Allow to cool for 15 to 20 minutes prior to glazing, if desired. (I found them easier to glaze while hot.)

Sunday, June 27, 2010

Daring Bakers: Chocolate Pavlovas and Chocolate Mascarpone Mousse

The June 2010 Daring Bakers' Challenge was hosted by Dawn of Doable and Delicious. Dawn challenged the Daring Bakers to make Chocolate Pavlovas and Chocolate Mascarpone Mousse. The challenge is based on a recipe from the book Chocolate Epiphany by Francois Payard.
This month's challenge was right up my alley. Chocolate and mascarpone cheese are two of my favorite things. There were three elements to this dessert.  A chocolate pavlova base (something I had never made but was happy for the opportunity), rich chocolate mascarpone mousse, and a mascarpone cream drizzled atop. I practically did a happy dance when I read that this was what we were making for June. It was definitely a labor-intensive dessert but upon deconstructing all the different components and tackling each individually, it was not at all daunting.
The chocolate pavlovas...having never made them before and, in fact, having never even eaten one, I wasn't sure what to expect.  I've seen them made on TV a lot lately, and I was definitely eager to give these a try. They were essentially whipped egg whites, lots of sugar, and then cocoa powder and icing sugar folded in. They are then piped onto parchment lined baking sheets.
The recipe says to bake them at 200 degrees for 2 to 3 hours.  That detail was the only part that made me a little nervous. That is a rather large window of time, leaving plenty of time for disaster, which meant it was up to me, a virtual pavlova virgin, to know when to take them out. I knew from all my reading that they were supposed to be crispy on the outside and chewy in the middle. Mine came out after an hour and 15 minutes and they were perfect, if I do say so myself. 
Next up, chocolate mascarpone mousse. Having read other members' comments, I knew that a lot people were finding the mousse to be grainy. The recipe says to heat the cream with the lemon zest until warm. Then add the chocolate and stir till smooth. Here's what mine looked like:
Not exactly encouraging. So I threw it in the microwave for 30 seconds on 50% power and then whisked it until my arm felt like it was going to fall off.  It was well worth the effort because eventually it looked like this:
Feeling much better, I proceeded with adding the mascarpone and am happy to report that my mousse was not at all grainy.
However, upon tasting the mousse, I was worried. First of all, I have never been a fan of citrus mixed with chocolate. I thought about omitting the lemon zest altogether, but then I decided to stay true to the recipe in the spirit of the challenge. That was a mistake.  I found the lemon over-powering for my taste. I also found that the mousse wasn't sweet enough. In fact, I found it wasn't sweet at all and I wrestled over whether I should add some confectioner's sugar. Thankfully, before I took this liberty with the recipe, I tasted the pavlovas which were really, really sweet. It was then that I had one of Oprah's "Aha moments". I see where this is going now. While the pavlovas were too sweet to be enjoyed on their own, the 'unsweet' mousse balanced it off. Right. 
Moving right along, the final component was the mascarpone cream which consisted of making a creme anglaise and then whisking in mascarpone cheese and whipped cream. I made my creme anglaise a couple days before, and then finished it just before serving. As far as I'm concerned, this was the best part of the recipe. I will definitely be incorporating this into my recipe arsenal and serving it with fresh berries. It was the one component that was delicious on its own. 
For serving, I added a handful of fresh raspberries. Initially, this was purely for esthetics, I knew it would need some color. But again, the raspberries acidity also provided a perfect balance for this very rich, chocolate dessert.


I served this dessert last night to my husband and our friends Lisa and John who had come over for a long over-due visit. It just so happened that they were the perfect audience for the debut of this dessert because, like us, they have an appreciation for food and were happy to be my official 'tasters' and give honest feedback. After the first bite, we were all on the fence about the strong lemon flavor in the mousse. But after a few more bites, it was decided by at least two of us that the citrus flavor did in fact have its place. This dessert really had a lot to offer in the way of textures and flavor. A sweet, crispy base with a chewy interior, a rich and decadent chocolate mousse, a light and silky vanilla sauce, topped with fresh, sweet berries. Lisa, a true foodie, talented gourmet chef, though not by trade, with a propensity for telling it like it is said it was wonderful, she wouldn't change a thing and she would order it at a restaurant. Now that's high praise. I'll call this one a success.   Definitely my favorite challenge so far!

Thursday, May 27, 2010

Daring Bakers: Croquembouche

The May 2010 Daring Bakers' Challenge was hosted by Cat of Little Miss Cupcake. Cat challenged everyone to make a Piece Montee or a Croquembouche, based on recipes from Peter Kump's Baking School in Manhattan and Nick Malgieri.
A Croquembouche is basically a tower of cream puffs held together with spun sugar or chocolate or a combination of both. There are 3 components to this challenge: 1) the pate a choux (the pastry or "puff" component; 2) the creme patissiere (the custard filling); and 3) the glaze used to mount and decorate (i.e. the caramel/spun sugar or chocolate). 
When tackled individually, none of these components is particularly difficult, however when you think about the project as a whole, it is can definitely be time consuming and tedious work. I did a lot of reading about this dessert, from all tips posted on the Daring Kitchen, to Martha Stewart to my Baking Illustrated book. The biggest hurdle by far for me to overcome was timing. If you use spun sugar (sugar melted into a caramel sauce that hardens and is the ideal glue for the 'tower'), refrigerating it is not an option. The moisture from the fridge would compromise the caramel thereby compromising the structure of your tower. In fact, refrigerating the puffs after they were filled was not recommended unless it was for a very short period of time; as the puffs would lose their crisp exterior, rendering them mushy. So ideally, this is a dessert you would assemble just prior to eating. This posed a major problem for me as our entertaining schedule was set for the month of May and I simply did not have the time to make this when we had people over to enjoy it. 
Initially I had rather grandiose plans that entailed using both the spun sugar and chocolate to decorate and I wanted to unveil it to my guests at my Mother's Day dinner. This did not happen. The following weekend was spoken for and the next thing I knew it was 2 days before the challenge deadline and I had not even begun. So, in the end, I opted out of the spun sugar, although I would have loved to tackle that, and decided to use chocolate as my "glue". Sadly, I pretty much threw this together halfheartedly, as I knew that there would be no one to share it with, other than my husband who does not eat sweets and my 2 children, who are picky eaters and prefer a bowl of marshmallows to cream puffs. It felt like a crime against the Croquembouche, which is a lovely dessert and definitely a show-stopper. But you really want to make it when you have plenty of time and a captive audience - I had neither. I refused, however, to not participate, and so here is my sadly uninspired rendition.
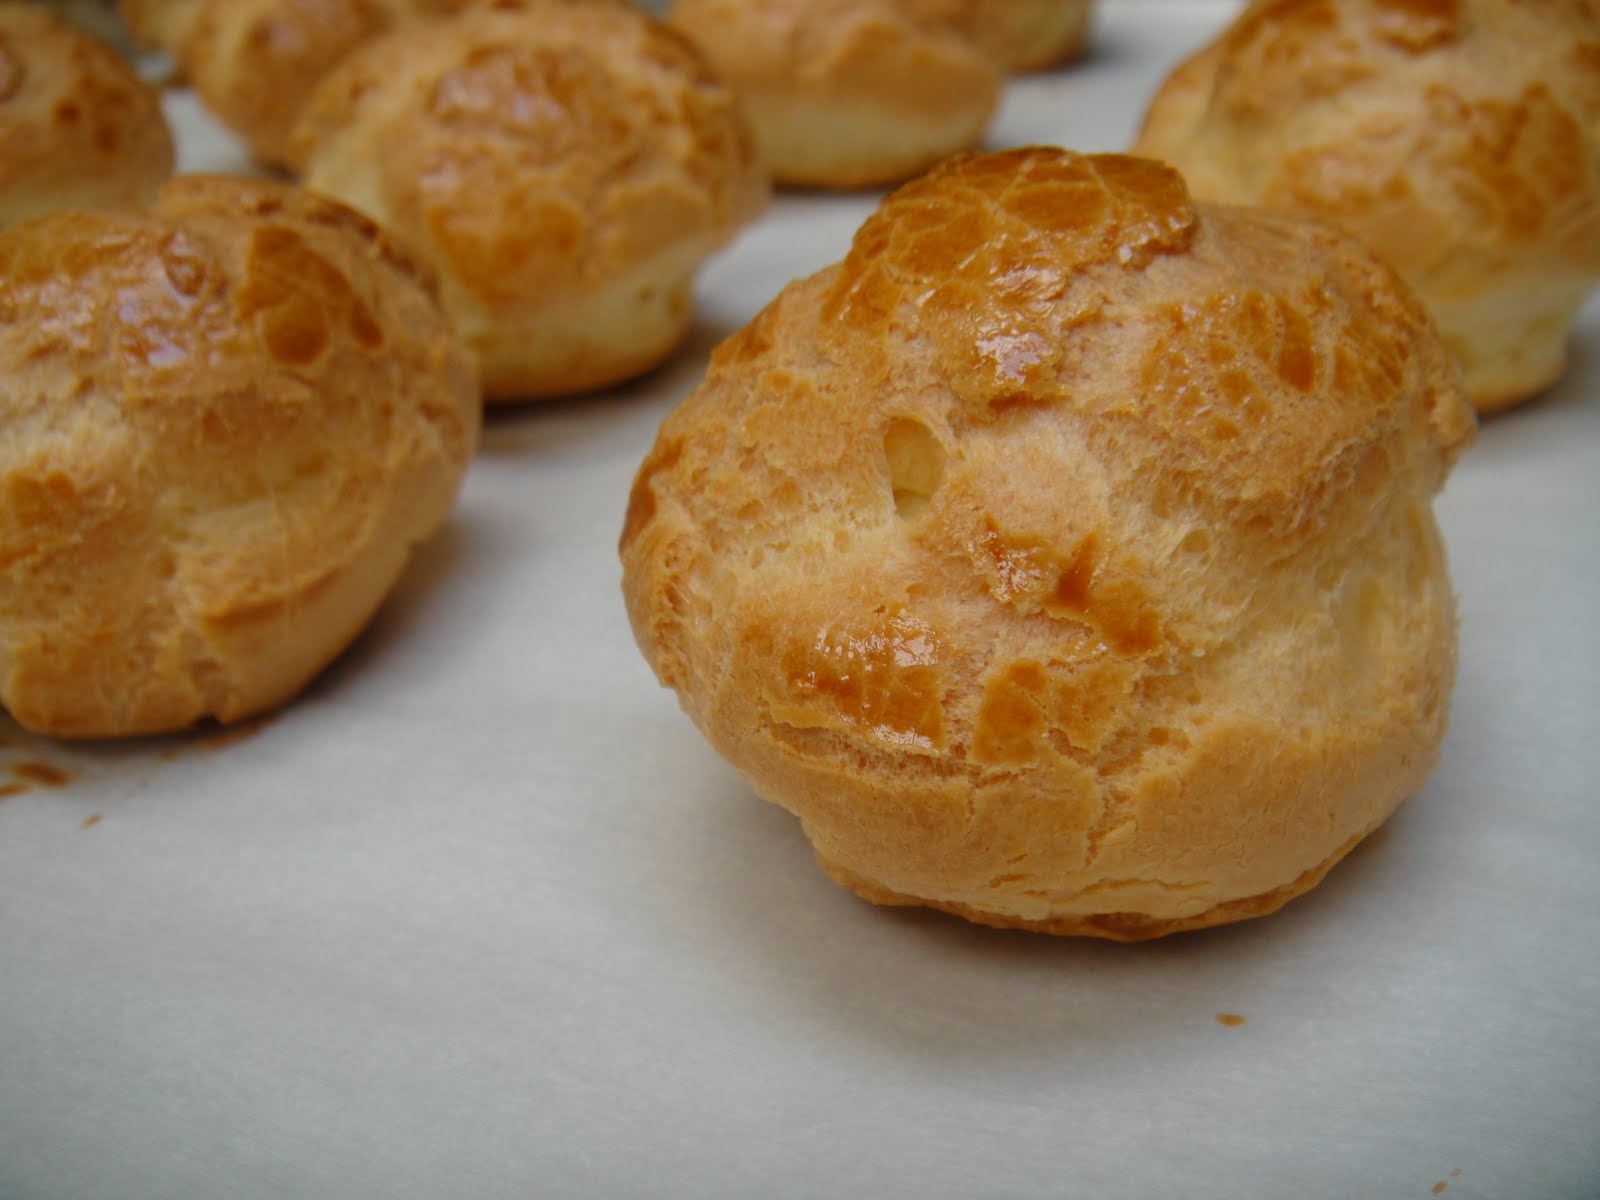
I started by piping the choux pastry onto parchment lined baking sheets.
Pressed down the pointed tops using fingers dipped in egg wash. Then brushed each pastry with egg wash.
Baked until golden brown.
Once cooled, pierced each puff with tip of squeeze bottle and filled with pastry cream. I chose to make the basic vanilla pastry cream, and used vanilla bean.
Dipped each cream puff into bowl of melted milk chocolate.
Began assembling "tower" - but mine was more of a "pile". I used toothpicks because the chocolate wasn't setting fast enough.
And finally, I took one off the top and tried it. It was delicious - although slightly anticlimactic, having no interested parties to share in my delight.
Thanks Cat for a great challenge.  This one was definitely off the beaten path.

Tuesday, April 27, 2010

The Daring Bakers: Traditional British Pudding


I joined a "cooking club" so to speak called "The Daring Kitchen".  You can either enroll as a Daring Baker or a Daring Cook, or both.  I joined as a Daring Baker. Each month a member of the club hosts the challenge and chooses a dish that everyone has to try. The host will tell you whether substitutions can be made and what exactly is required of you. So this was my very first challenge.  The challenge was unveiled to its members on the first of the month, and I'm not kidding when I tell you that I was up early on March 1st, logging onto the Daring Kitchen website to see what I had gotten myself into.  We have to reveal our results on our respective blogs on the 27th. They do blog checks to ensure that the participants have, in fact, participated and so there are mandatory lines we must include in our post and they are:
The April 2010 Daring Baker's challenge was hosted by Ester of The Lilac Kitchen. She challenged everyone to make a traditional British pudding using, if possible, a very traditional ingredient: suet.
Okay, now that that's out of the way, let me tell you about this fun little exercise. The idea was to try a traditional British Pudding - which meant steaming. Ester did allow that the participants use a suet substitute (lard, butter, oil etc.) but there was no getting around the steaming.  Admittedly, the recipe I chose from one of the permitted sources: The Pudding Club website was not exactly "traditional" but it did fulfill my obligations.  A lot of people chose a savoury version (i.e. steak and kidney pie) but that did nothing for me.  It was with much trepidation that I tackled this challenge, I've never steamed a dessert, but as it turns out, my fears were completely unfounded.  This was easy to throw together, and I'm thinking I may even do it again.  I don't have a proper pudding basin for steaming, and I was more confused by the diagrams and suggestions of make-shift steaming contraptions offered by the members of the club.  In the end, I pulled out a cheap ceramic bowl I'd bought at Ikea years ago, put a piece of pleated foil over it to allow for rising:
tied some butcher's twine around the neck (cause that's what everyone else was doing)
and then I stuck the bowl inside my metal steamer/colander; placed that over a pot of boiling water; and then waited with baited breath.
After an  hour and a half of steaming (I did use a lid), I had a delicious, moist and very chocolatey "pudding" (or cake to the rest of us) that looked like this:
What was all the fuss about?  I waited until the last possible day to do this challenge because I was so  unsure, but I was quite pleased with the final results.  Honestly, the idea of signing up for a club that basically forces me to try new things, things that I would probably never otherwise try, was really scary initially.  But now, I realize I was being silly.  Of course, I say that now, not knowing what the May challenge will be...I just hope it's something delicious that is worthy of being served at my Mother's Day dinner that I'm hosting
The only negative thing I'll say about this is that it's not exactly the most pretty dessert.  You can try to dress it up and make it look elegant (and I did try) but in the end, I settled on tossing it in a bowl with a scoop of my homemade vanilla ice cream and calling it a day.
Now, if only I'd had some of that Chocolate Fudge Sauce left...
If you're interested in trying this out for yourself, check out this link: The Pudding Club

Related Posts with Thumbnails